When building outdoor landscaping projects in hillside settings there are a number of challenges along with amazing possibilities that one should consider. This detailed example of a recent extensive retaining wall and patio project should show how these issues came to light and how they were dealt with over the course of a yearlong plus project.
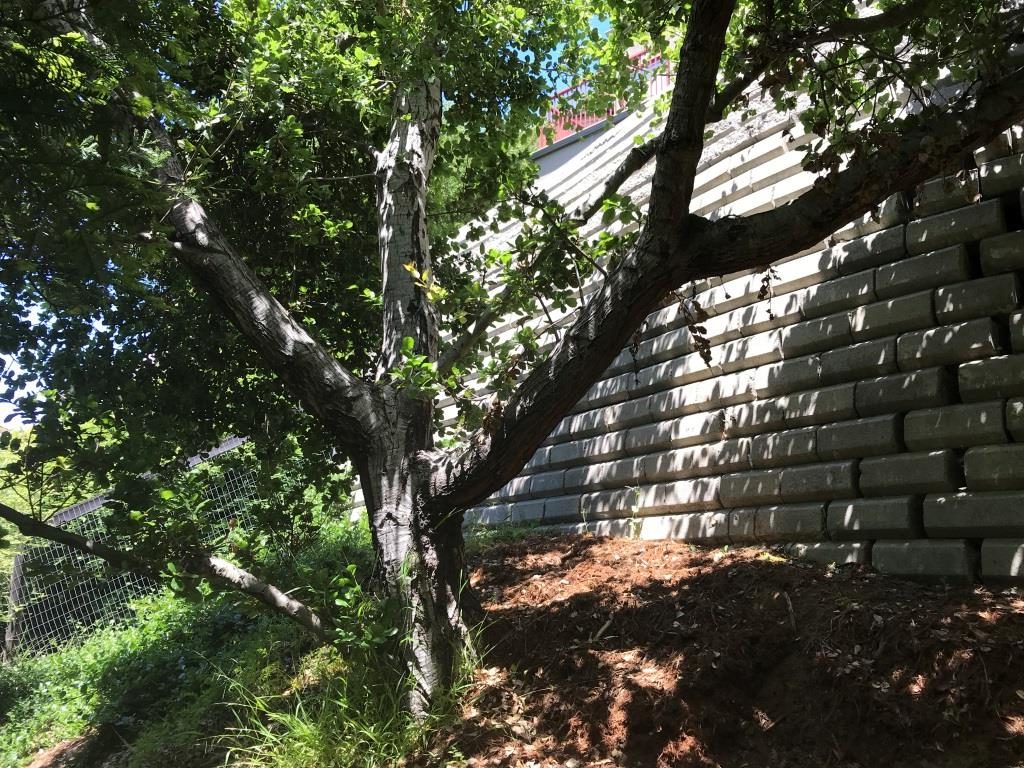
The initial scope of work was to replace a 9’ tall block retaining wall and patio that was beginning to fail. This impressive home in the Oakland hills was rebuilt after the fire, but as is typical, things like drainage work and retaining walls in the yard were a lower priority compared to the main house, and poor detailing and inexpensive construction were not holding up to the test of time. Without any reinforcement or real footings this large block wall was starting to shift downhill and the patio had sunk, exaggerated by a lack of appropriate drainage. During the design phase the owner decided to create a lower patio as well. This required another 9’ wall, but the planning and zoning department would only allow a 6’ height for any new walls. We decided to create a shorter 3’ wall at the front for a planting area, with a 6’ wall at the bottom of the lower patio.
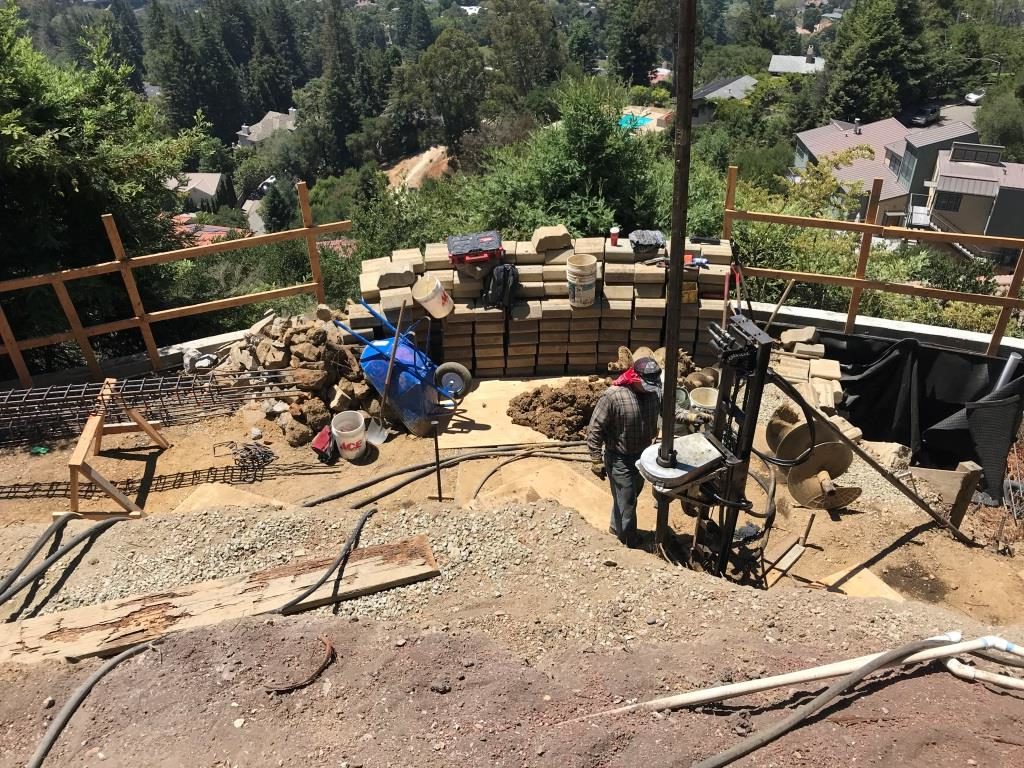
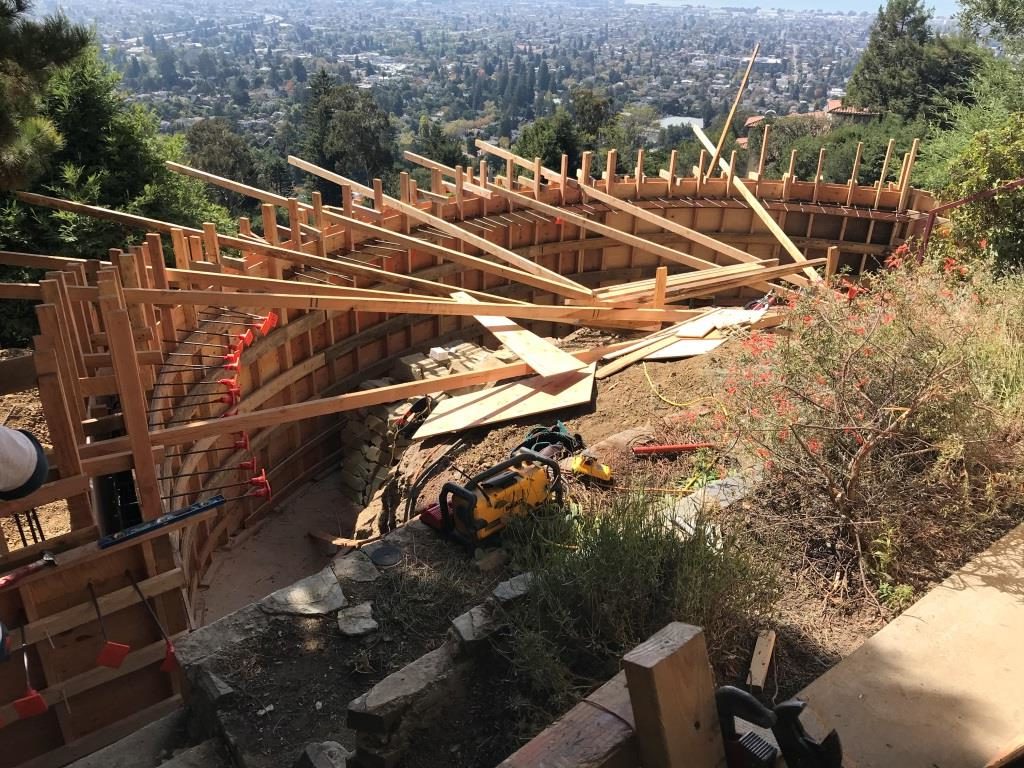
The plan was to build a set of new reinforced curved concrete walls and stairs that were faced with stone. This required a fair amount of engineering to start. The new walls required reinforced concrete piers averaging about 13’ deep. Unfortunately, the drilling was time consuming, ironically because the soil was good and hard, with the drilling slowing substantially below the 9’ mark. Since drillers are paid by the hour, this added to the cost as the last 4’ or so of depth took about twice as long to drill as the first 9’. And because of the steep rear yard and limited access via stairs from the front the holes had to be drilled with a portable rig, which was slow and time consuming to move around. Drilling alone took around 2 months to complete.
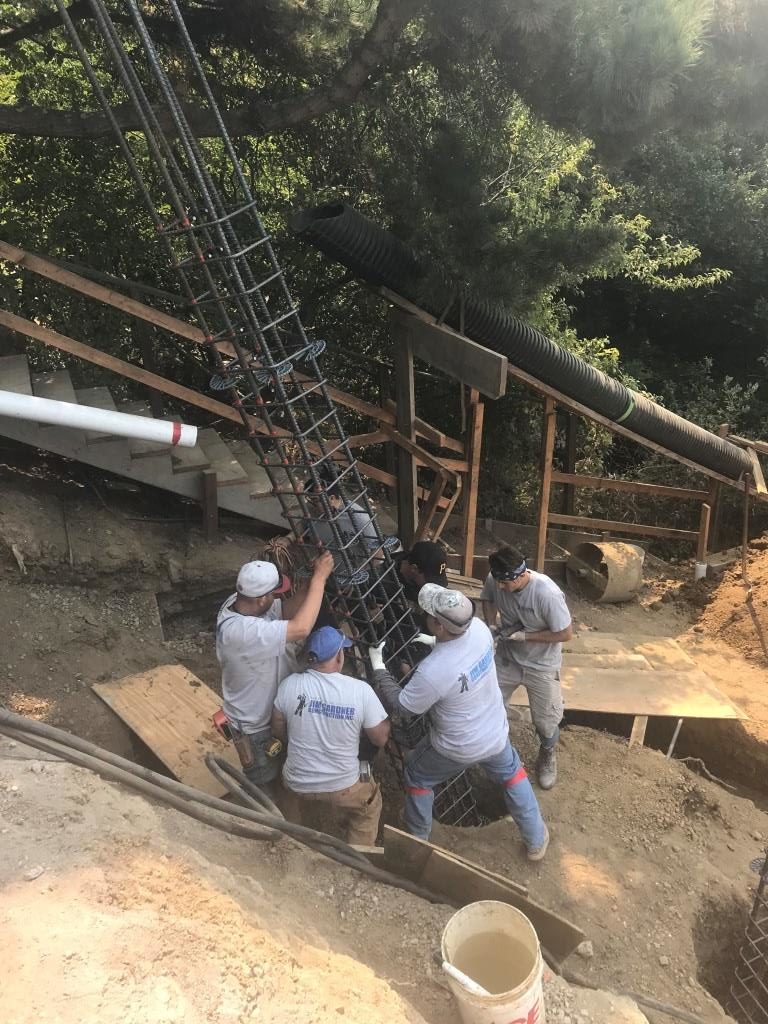
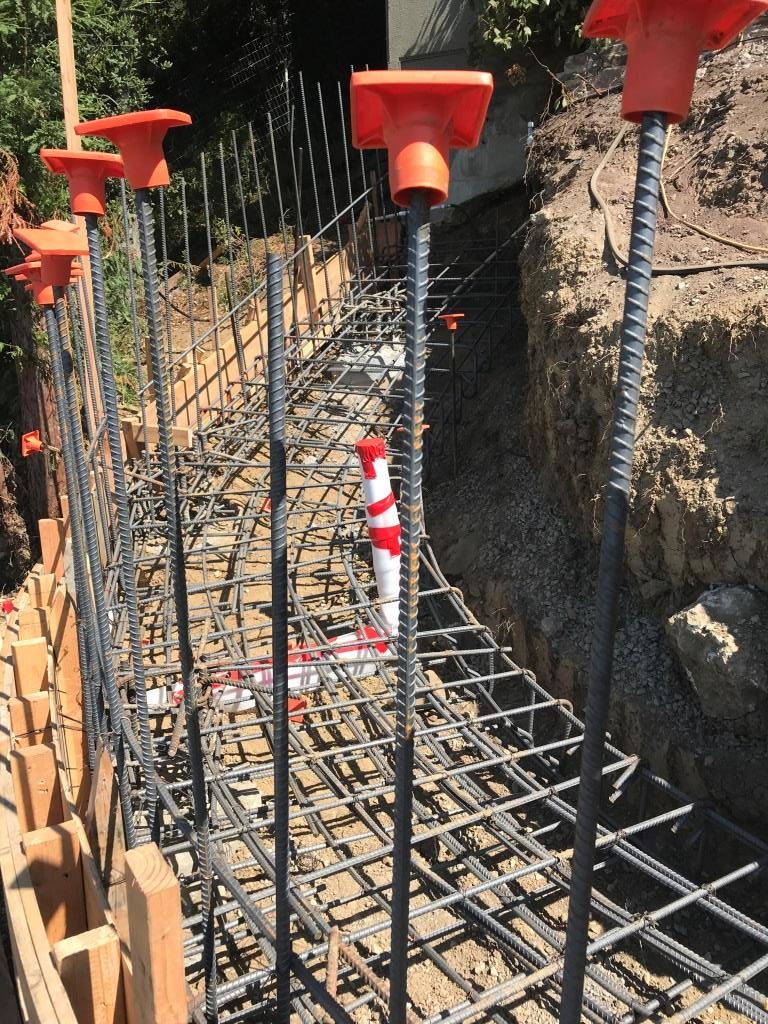
Once the piers were reinforced and concrete was poured we began the process of installing the rebar and forms for the footings to the concrete walls connecting between the piers. As you can see the amount of steel was extensive. All of the materials had to be brought to the site down a long stairway on one side of the house. To facilitate that process, we installed a series of large plastic tubes to bring material down to the job (primarily gravel) and larger 24” diameter tubes at the bottom of the site to carry dirt down to the street below and into a large dump trailer (the property fortunately bordered on 2 streets). At the bottom of the site the yard dropped off at an extreme slope. After excavating for the lower 6’ wall we realized that we were too close to the edge of the drop-off on one side and we had to add a fourth wall, 6’ tall on one end, that was tied into our original lower wall to help stabilize it. At the end of the day we ended up drilling over 50 piers in total!
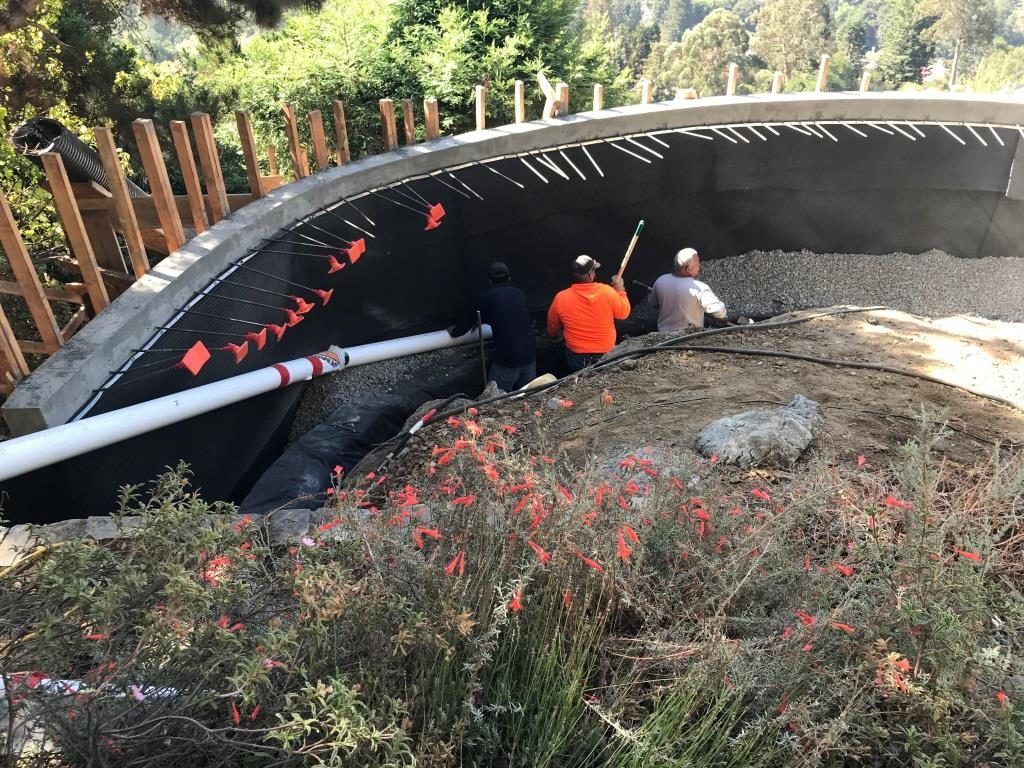
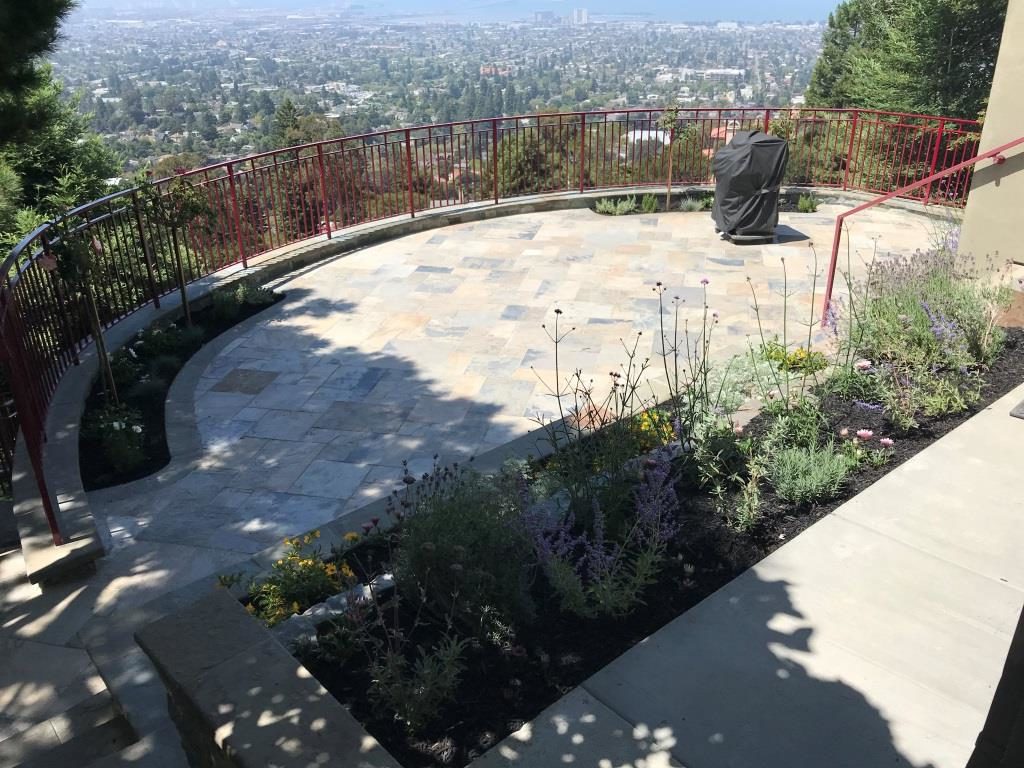
Once the new walls were poured we installed a membrane, piping and gravel for drainage. Conduits were installed for lighting and irrigation. The spaces behind the walls were backfilled, and reinforced concrete was poured for the patio and stairs. Stonework was installed to face the upper 2 walls, along with slate for the patio. Stone caps were fabricated on-site for the walls. Custom railings were fabricated and installed for the taller walls and stairs. Landscaping, lighting and irrigation were put in as the final touches.

There are several takeaways from this work that are important to consider for hillside structural and landscaping projects. The requirements to design and create a properly engineered job that will stand the test of time can be significant. Pier drilling may be slow, especially with portable equipment. Excavation can affect the area adjacent to the site if the space is limited and the grade is steep (it required us to build an additional wall). Access to the site can be a major factor in how long the project lasts. Carting tons of materials back and forth via a long set of stairs added substantial time to the job. Custom curved walls, footings and railings are slow and expensive to produce in comparison to rectangular structures. The bottom line is that you have to consider the site conditions carefully when planning a large project such as this. Given the serious slopes and tall walls this approach was necessary here. For projects with less severe conditions and options for doing shorter (non-structural) tiered walls there maybe be block or rock wall options. For non-engineered walls (typically shorter than 4’) that would dramatically simplify the job, particularly when the walls are not close to the house and are more landscaping in nature.
This article was written by Jim Gardner of Jim Gardner Construction Inc. Jim is a long-time Piedmont resident and has been doing structural repair in your neighborhood since 1983. To schedule an estimate or for more information please go to our website at jimgardnerconstruction.com.